Rocky Linux 9 installation on ZFS pool
Hello! Today I will show you how to install Rocky Linux 9 directly on ZFS pool.
I was trying to setup my new homelab server (which I hope to write about in the future) and while trying to decide which OS to use, I decided to stick with traditional linux server OS install and go with Rocky Linux. It’s a great RHEL based distribution that I like to use for all my server needs.
Before deciding to go with RockyLinux I was considering using TrueNAS SCALE which is a great OS for ZFS storage, but it did not support WiFi connectivity (it even has default WiFi drivers stripped from the kernel) and there was a requirement for me to have WiFi connectivity on the server. TrueNAS SCALE by default uses ZFS as a storage backend and bootstraps itself on ZFS pool which is a great feature. ZFS allows you to have a lot of flexibility in managing your storage, makes snapshots and backups easy and is, overall, a great filesystem for servers.
As ZFS is not available out of the box in Rocky Linux, I had to look up articles that detail the process of installing this distribution on ZFS pool. Fortunately I have found few great articles that helped me to move forward, however I had to adjust the process a bit to allow usage of ZFS Boot Menu (it allows to boot directly into snapshots, which is a great life-saver) and to make it work on RockyLinux which is not the most popular distribution choice out there.
Installation process
In order to setup the Rocky Linux on ZFS pool, you will need to follow the steps below:
- Boot into another linux distribution (I used Alpine linux for this purpose)
- Setup ZFS pool
- Install Rocky Linux on ZFS pool
- Configure it to support ZFS
- Install and configure ZFS boot menu
In order to showcase the process I will use a virtual machine (powered by VMware Workstation) running on my workstation.

Booting into Alpine Linux
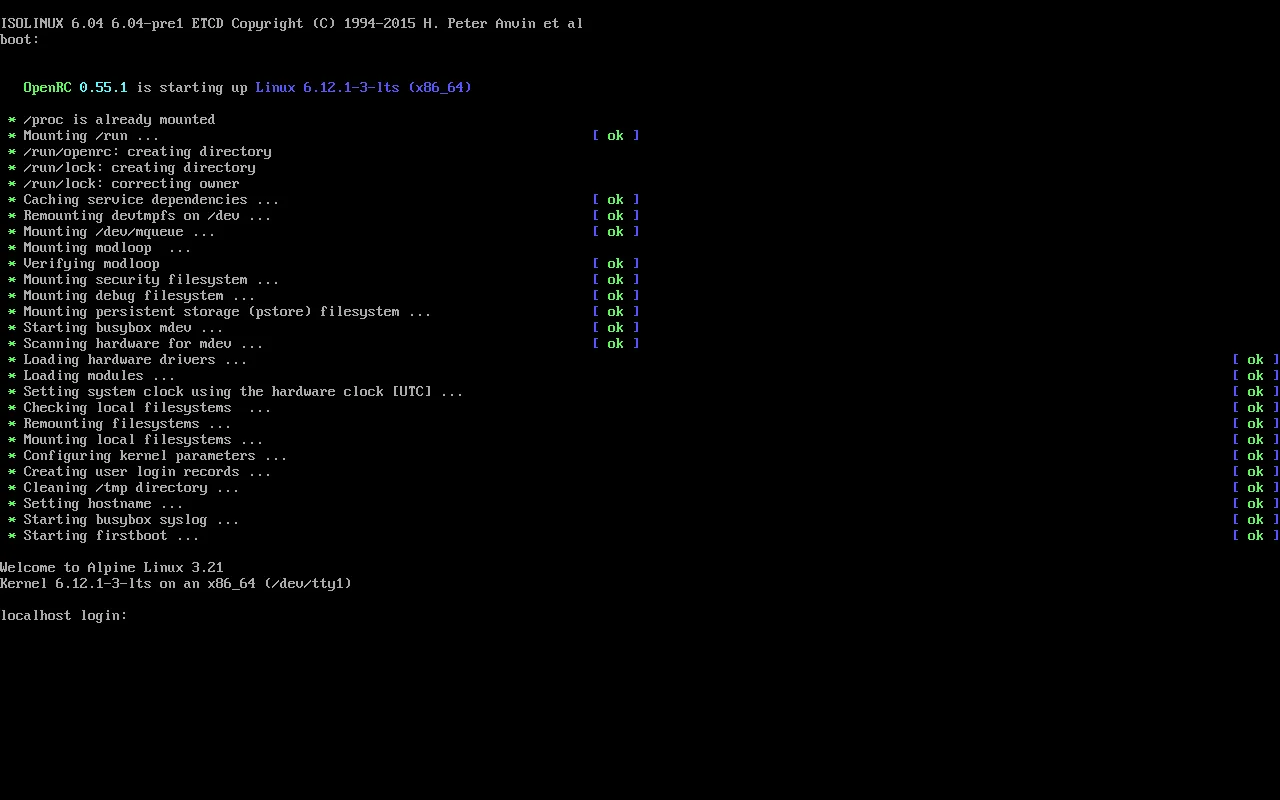
First step is to boot into another linux distribution that will allow us to setup ZFS pool. I used Alpine Linux for this purpose, as it’s a small and lightweight distribution that can be booted from USB stick and has ZFS support out of the box. Make sure that you use the Extended version of Alpine Linux, as it has ZFS support included.

Login as root (no password required) and setup your network connection.
localhost:~# apk add wpa_supplicant
localhost:~# apk add util-linux
localhost:~# setup-interfaces -r # setup network connection (setup your WiFi or ethernet connection; if you're not sure how to fill the fields, just press enter to use default values)
localhost:~# setup-sshd # enable SSH server (optional; you can use SSH to connect to the VM)
localhost:~# setup-apkrepos # setup repositories (when prompted enable community repository by pressing c, and then use r - to use random mirror)
localhost:~# apk update
localhost:~# apk add eudev
localhost:~# setup-devd udev # makes it possible to access disks through /dev/disk/by-id
localhost:~# lsblk # check if your disks are visible and find the one you want to setup ZFS pool in

NAME  MAJ:MIN RM   SIZE RO TYPE MOUNTPOINTS
loop0   7:0    0 208.6M  1 loop /.modloop
sda     8:0    0    16G  0 disk  # this is the disk I will use for ZFS pool
sr0    11:0    1   953M  0 rom  /media/cdrom
When installing ZFS make sure that the version in alpine will be compatible with the version in Rocky Linux. In my case the default version of ZFS in Alpine was 2.2.7-1 and in Rocky Linux 2.1.16-1, which is incompatible. I had to downgrade the apk repositories in Alpine to get the compatible version of ZFS. To do so I had to edit the /etc/apk/repositories file and change the version of the repository to v3.18 (which is the version that has the compatible version of ZFS).
- Open configuration file:
localhost:~# vi /etc/apk/repositories - Change the version of the repository to
v3.18
- /media/cdrom/apks
- http://pkg.adfinis-on-exoscale.ch/alpine/v3.21/main
- http://pkg.adfinis-on-exoscale.ch/alpine/v3.21/community
+ http://pkg.adfinis-on-exoscale.ch/alpine/v3.18/main
+ http://pkg.adfinis-on-exoscale.ch/alpine/v3.18/community- Save and update the repositories:
localhost:~# apk update
Setting up ZFS pool
Let’s go back into the installation process:
localhost:~# apk add zfs
localhost:~# modprobe zfs
localhost:~# zpool version
zfs-2.1.14-1        # verify that the version is compatible with the version in Rocky Linux
zfs-kmod-2.2.6-1
# Define variables for the disk you want to use for ZFS pool for multi disk setup look here (https://docs.zfsbootmenu.org/en/v2.3.x/guides/void-linux/uefi.html)
localhost:~# export BOOT_DISK="/dev/sda"
localhost:~# export BOOT_PART="1"
localhost:~# export BOOT_DEVICE="${BOOT_DISK}${BOOT_PART}"
localhost:~# export POOL_DISK="/dev/sda"
localhost:~# export POOL_PART="2"
localhost:~# export POOL_DEVICE="${POOL_DISK}${POOL_PART}"

# Prepare disks
localhost:~# apk add sgdisk
localhost:~# zpool labelclear -f "$POOL_DISK"
localhost:~# wipefs -a "$POOL_DISK"
localhost:~# wipefs -a "$BOOT_DISK"
localhost:~# sgdisk --zap-all "$POOL_DISK"
localhost:~# sgdisk --zap-all "$BOOT_DISK"

# Create EFI boot partition
localhost:~# sgdisk -n "${BOOT_PART}:1m:+512m" -t "${BOOT_PART}:ef00" "$BOOT_DISK"

# Create zpool partition
localhost:~# sgdisk -n "${POOL_PART}:0:-10m" -t "${POOL_PART}:bf00" "$POOL_DISK"

# Create ZFS pool (it's unencrypted, you can add encryption if you want)
localhost:~# zpool create -f -o ashift=12 \
 -O compression=lz4 \
 -O acltype=posixacl \
 -O xattr=sa \
 -O relatime=on \
 -o autotrim=on \
 -m none zroot "$POOL_DEVICE"

# Create ZFS datasets
localhost:~# export ID="rocky"
localhost:~# zfs create -o mountpoint=none zroot/ROOT
localhost:~# zfs create -o mountpoint=/ -o canmount=noauto zroot/ROOT/${ID}
localhost:~# zfs create -o mountpoint=/home zroot/home
localhost:~# zpool set bootfs=zroot/ROOT/${ID} zroot

# Let's export and import the pool to make sure it's mounted correctly
localhost:~# zpool export zroot
localhost:~# zpool import -N -R /mnt zroot
localhost:~# zfs mount zroot/ROOT/${ID}
localhost:~# zfs mount zroot/home

# Let's check if the pool is mounted correctly
localhost:~# mount | grep mnt
zroot/ROOT/rocky on /mnt type zfs (rw,relatime,xattr,posixacl,casesensitive) # this should be mounted
zroot/home on /mnt/home type zfs (rw,relatime,xattr,posixacl,casesensitive)  # this should be mounted

# Update device symlinks
localhost:~# udevadm trigger
Installing Rocky Linux
Now that we have the ZFS pool setup, we can proceed with the installation of Rocky Linux.
localhost:~# apk add curl # Install curl to download the image
localhost:~# curl --fail-early --fail -L https://dl.rockylinux.org/vault/rocky/9.2/images/x86_64/Rocky-9-Container-Base.latest.x86_64.tar.xz -o rootfs.tar.gz # Download latest version of Rocky Linux container image
localhost:~# tar x -C "${MNT}" -af rootfs.tar.gz # Extract the image to the root ZFS pool
localhost:~# apk add arch-install-scripts # Install arch-install-scripts to use chroot
localhost:~# export MNT="/mnt"
localhost:~# cp /etc/resolv.conf "${MNT}"/etc/resolv.conf # Copy DNS settings
localhost:~# for i in /dev /proc /sys; do mkdir -p "${MNT}"/"${i}"; mount --rbind "${i}" "${MNT}"/"${i}"; done # Mount /dev, /proc and /sys
localhost:~# chroot "${MNT}" /bin/bash # Chroot into the Rocky Linux
[root@localhost /]# unalias -a # Unalias all commands
[root@localhost /]# dnf -y install --allowerasing @core kernel-core kernel-modules NetworkManager-wifi # Install the base system
[root@localhost /]# dnf install -y https://zfsonlinux.org/epel/zfs-release-2-3"$(rpm --eval "%{dist}"|| true)".noarch.rpm # Install ZFS repository
[root@localhost /]# dnf config-manager --disable zfs
[root@localhost /]# dnf config-manager --enable zfs-kmod
[root@localhost /]# dnf install -y zfs zfs-dracut
[root@localhost /]# cat << EOF > /etc/dracut.conf.d/zfs.conf
nofsck="yes"
add_dracutmodules+=" zfs "
omit_dracutmodules+=" btrfs "
force_drivers+=" zfs "
EOF
[root@localhost /]# if grep mpt3sas /proc/modules; then
  echo 'force_drivers+=" mpt3sas "'  >> /etc/dracut.conf.d/zfs.conf
fi
[root@localhost /]# if grep virtio_blk /proc/modules; then
  echo 'filesystems+=" virtio_blk "' >> /etc/dracut.conf.d/fs.conf
fi
[root@localhost /]# find -D exec /lib/modules -maxdepth 1 \
-mindepth 1 -type d \
-exec sh -vxc \
'if test -e "$1"/modules.dep;
   then kernel=$(basename "$1");
   dracut --verbose --force --kver "${kernel}";
 fi' sh {} \; # Rebuild initramfs
[root@localhost /]# fixfiles -F onboot # Fix SELinux labels
[root@localhost /]# zgenhostid -f -o /etc/hostid # Generate hostid
[root@localhost /]# dnf install -y glibc-minimal-langpack glibc-langpack-en # Install language packs
[root@localhost /]# rm -f /etc/localtime # Remove localtime
[root@localhost /]# systemd-firstboot \
--force \
--locale=en_US.UTF-8 \
--timezone=Europe/Warsaw \
--hostname=homelab \
--keymap=pl # Setup system
[root@localhost /]# passwd # Set root password
Configuring ZFS Boot Menu
Now that we have the Rocky Linux installed on ZFS pool, we can proceed with the installation of ZFS Boot Menu.
[root@localhost /]# zfs set org.zfsbootmenu:commandline="quiet" zroot/ROOT # Set commandline for ZFS Boot Menu
[root@localhost /]# dnf install dosfstools # Install mkfs.vfat\
[root@localhost /]# mkfs.vfat -F32 "$BOOT_DEVICE" # Format EFI partition
[root@localhost /]# cat << EOF >> /etc/fstab
$( blkid | grep "$BOOT_DEVICE" | cut -d ' ' -f 2 ) /boot/efi vfat defaults 0 0
EOF

mkdir -p /boot/efi
mount /boot/efi # Mount EFI partition
[root@localhost /]# mkdir -p /boot/efi/EFI/ZBM
curl -o /boot/efi/EFI/ZBM/VMLINUZ.EFI -L https://get.zfsbootmenu.org/efi
cp /boot/efi/EFI/ZBM/VMLINUZ.EFI /boot/efi/EFI/ZBM/VMLINUZ-BACKUP.EFI # Fetch a prebuilt ZFSBootMenu EFI executable, saving it to the EFI system partition
[root@localhost /]# dnf install efibootmgr # Install efibootmgr
[root@localhost /]# efibootmgr -c -d "$BOOT_DISK" -p "$BOOT_PART" \
  -L "ZFSBootMenu (Backup)" \
  -l '\EFI\ZBM\VMLINUZ-BACKUP.EFI'

efibootmgr -c -d "$BOOT_DISK" -p "$BOOT_PART" \
  -L "ZFSBootMenu" \
  -l '\EFI\ZBM\VMLINUZ.EFI' # Create a boot entry for ZFSBootMenu

[root@localhost /]# exit # Exit chroot
localhost:~# umount -n -R /mnt # Unmount /dev, /proc and /sys
localhost:~# zfs snapshot -r rpool@initial-installation # Create a snapshot of the installation
localhost:~# zpool export zroot # Export ZFS pool
localhost:~# reboot # Reboot the system
After rebooting the system you should see the ZFS Boot Menu that will allow you to boot into the system or into the snapshots. In order to boot into the snapshot, you will need to wait for 10 seconds or click ‘enter’ to boot into the first snapshot.
Conclusion
I hope this article will help you to setup your Rocky Linux on ZFS pool. It’s a great way to manage your storage and have a lot of flexibility in managing your system. If you have any questions or suggestions, feel free to contact me via email or social media.
Shoutout to the authors of the articles that helped me to setup the system:
Without them I would not be able to setup the system correctly. I will try to write more articles about my homelab setup in the future (I had a few little adventures which I encountered already 😄), so stay tuned for more content and have a great day!